To make a timeline of events more accurate, you can branch out your incident investigation diagram. Follow these steps:
Step 1: In the Projects Menu, open your diagram.
Step 2: Start by dragging an element into the diagram and hovering it above or below an existing element. A bold, black indicator should appear when you hover over the element. This shows where the element will branch off if added. A new branch should appear. From here, you can start building out the investigation, adding more elements.
Note that you can only branch through the following elements: Barrier, Threat, Consequence, and Event.
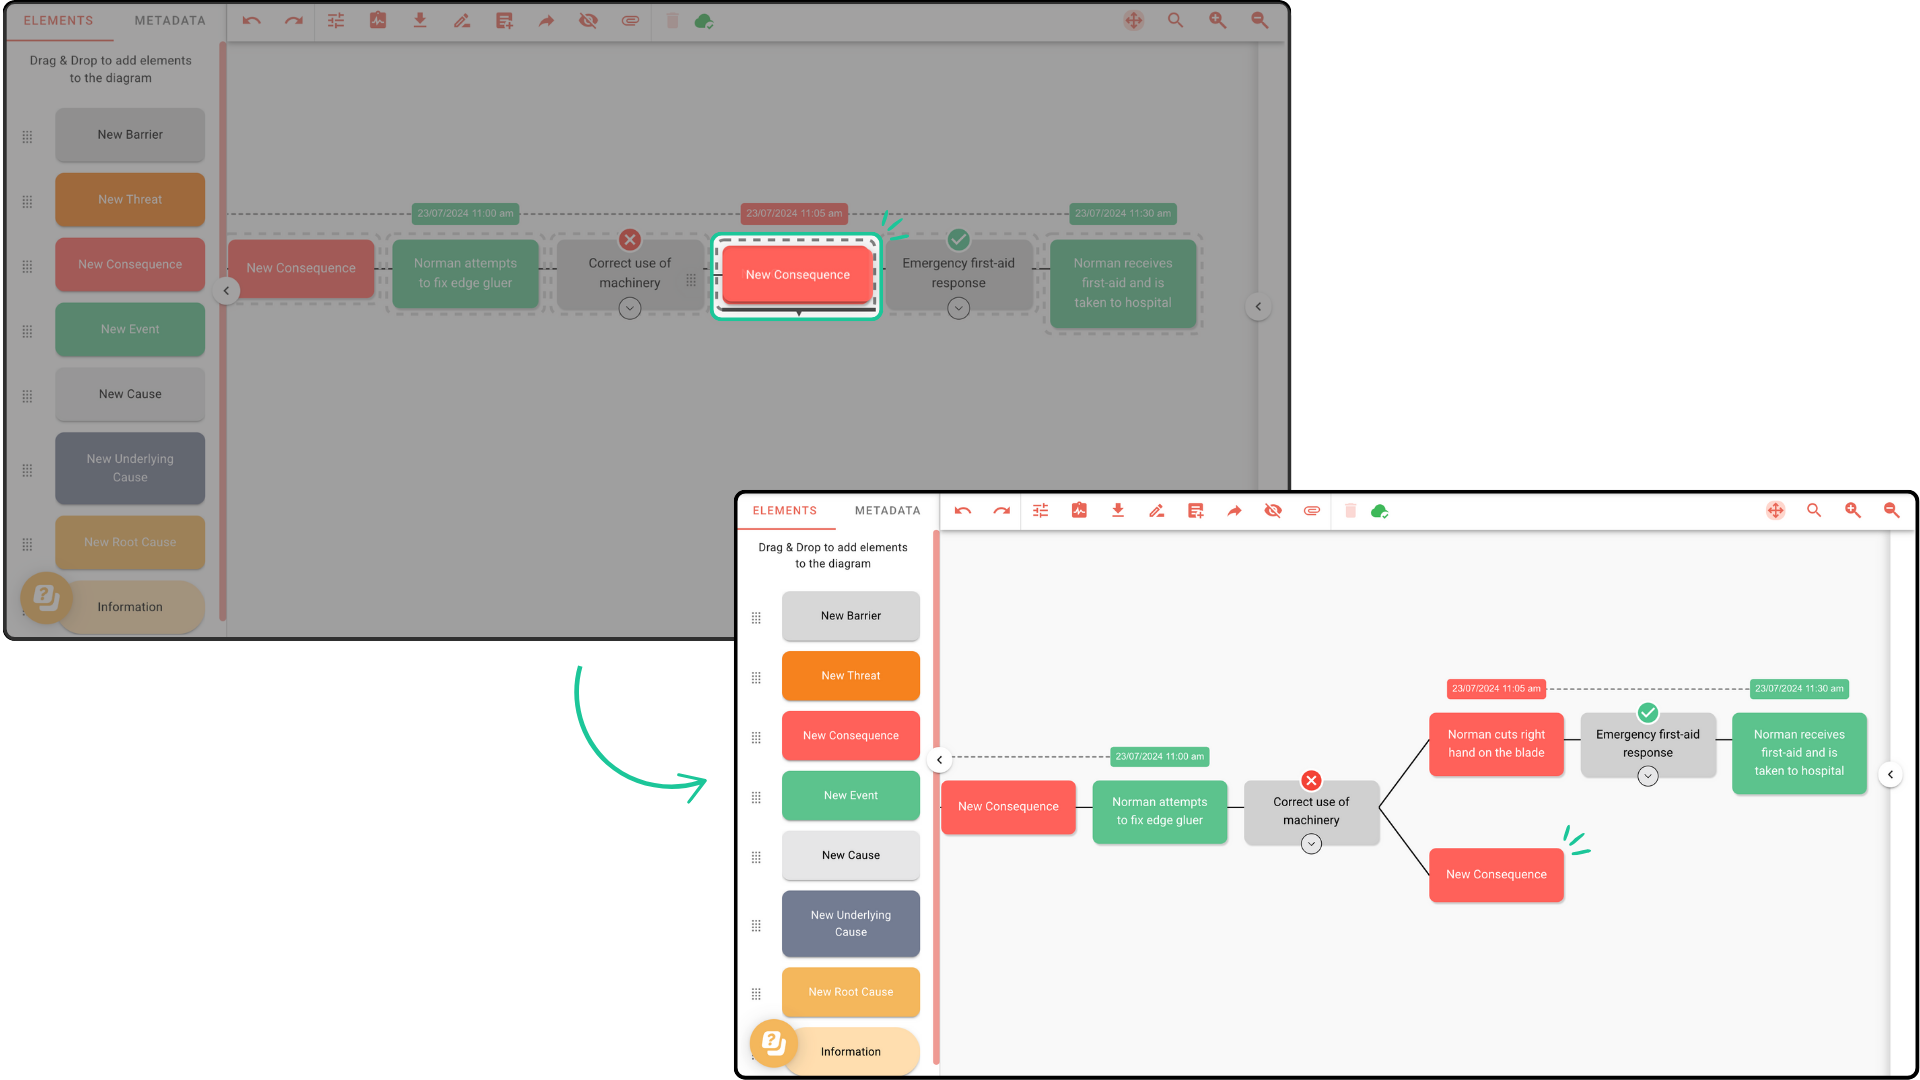
From the newly added branch, you can continue the timeline by adding other elements and uncovering the root cause.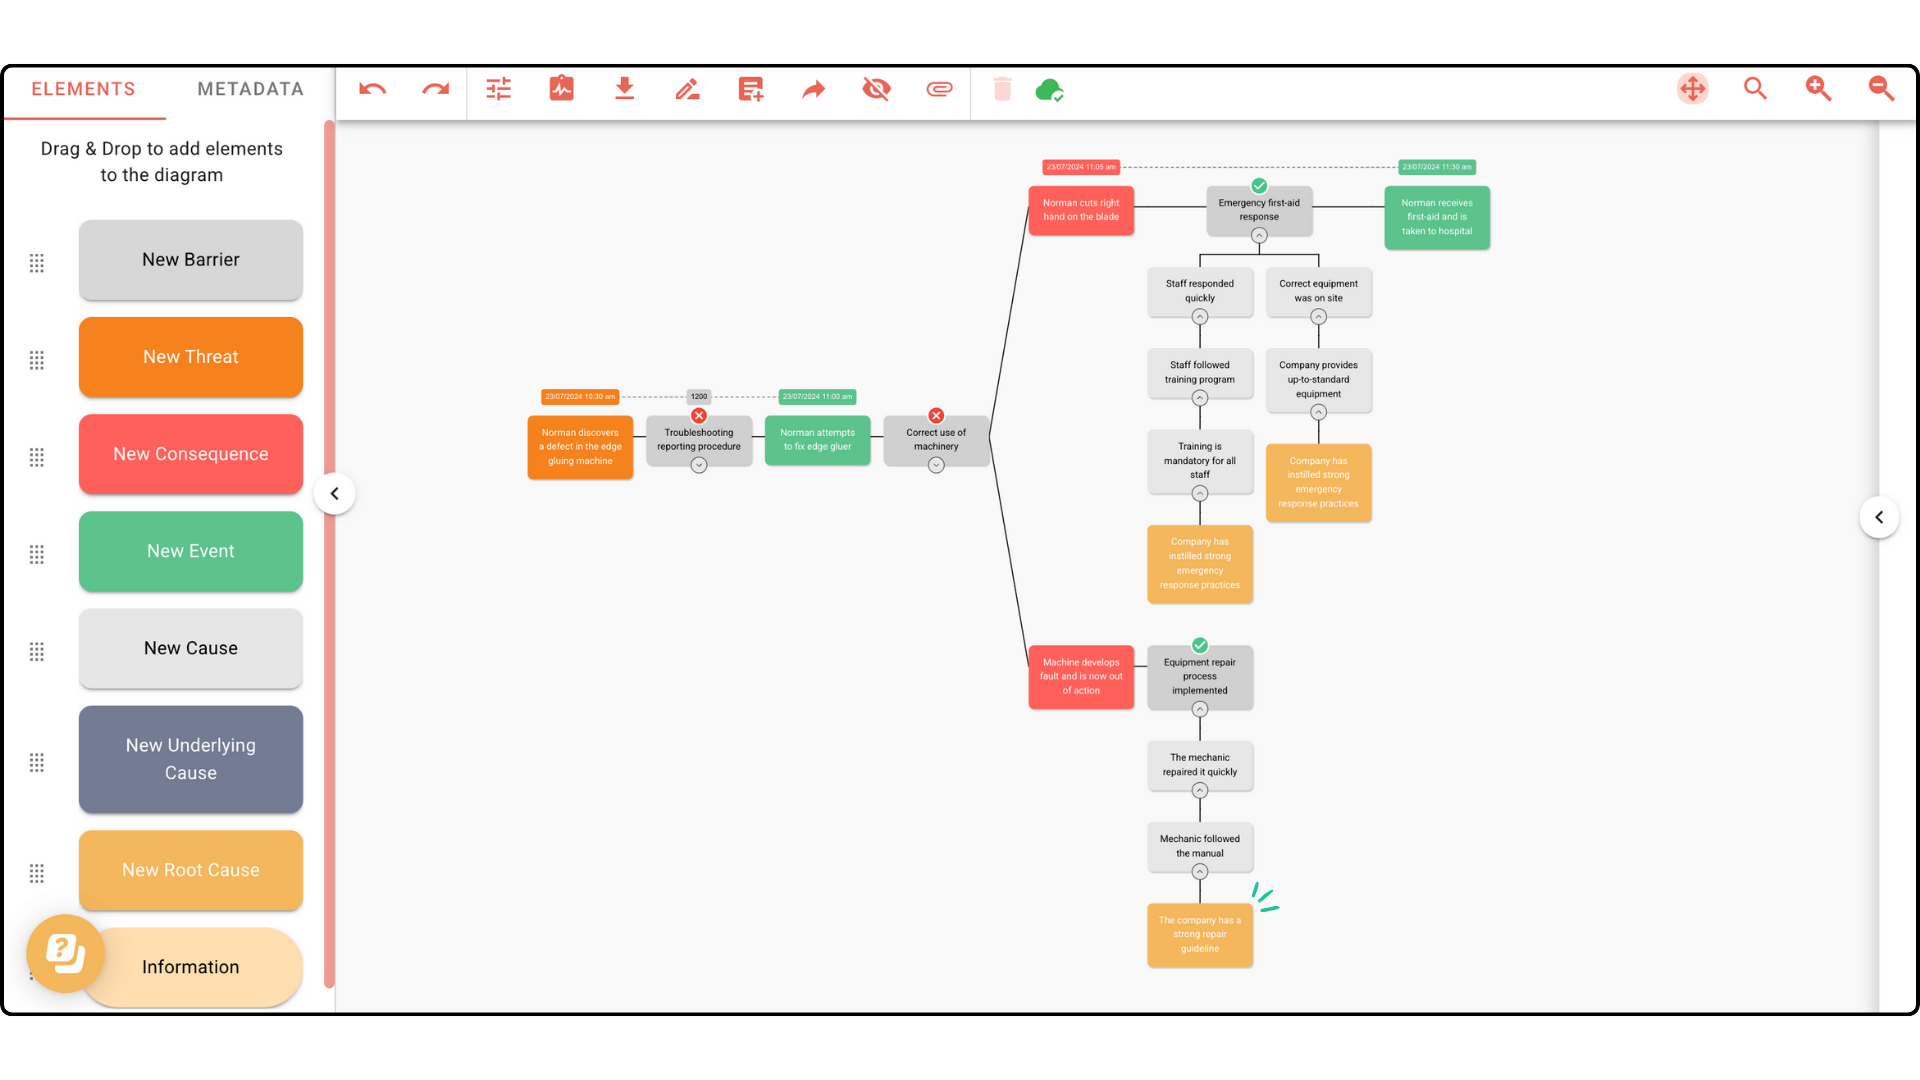
Incident Investigation Tip: There is no limit to how many branches you can add to an investigation. This feature has been designed to allow you to accurately recreate a timeline of events. Not all incidents are linear, some have multiple factors which need to be accounted for within an in-depth investigation.
Below is an example of a multi-branch diagram.


