Metadata allows you to record additional information for your elements. This information could include the barrier type, its condition, owner, location, and more. In this guide, we’ll show you how to add, delete, edit, and link metadata within a diagram.
Creating new metadata within a diagram
Note: New metadata created within a diagram will only apply to that diagram.
Step 1: To create a new diagram, head to the Metadata Menu. Click + Metadata. 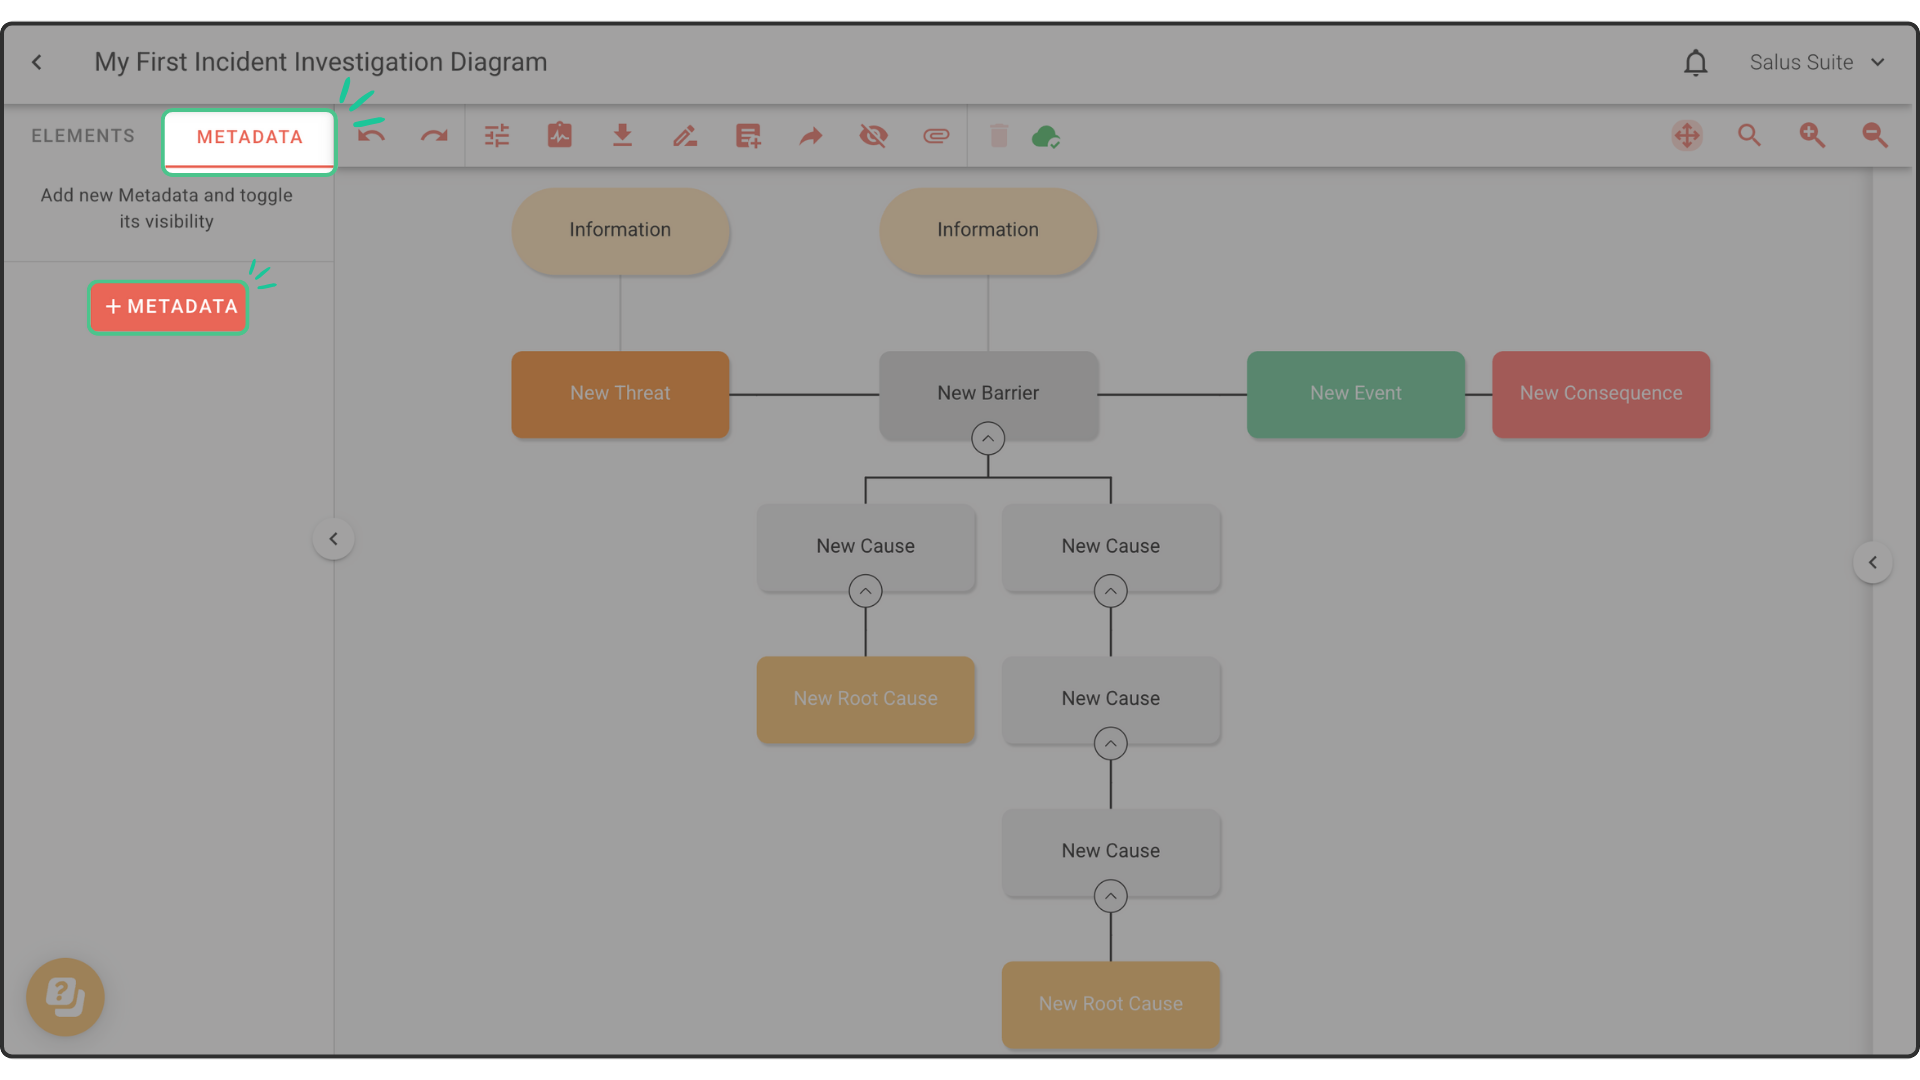
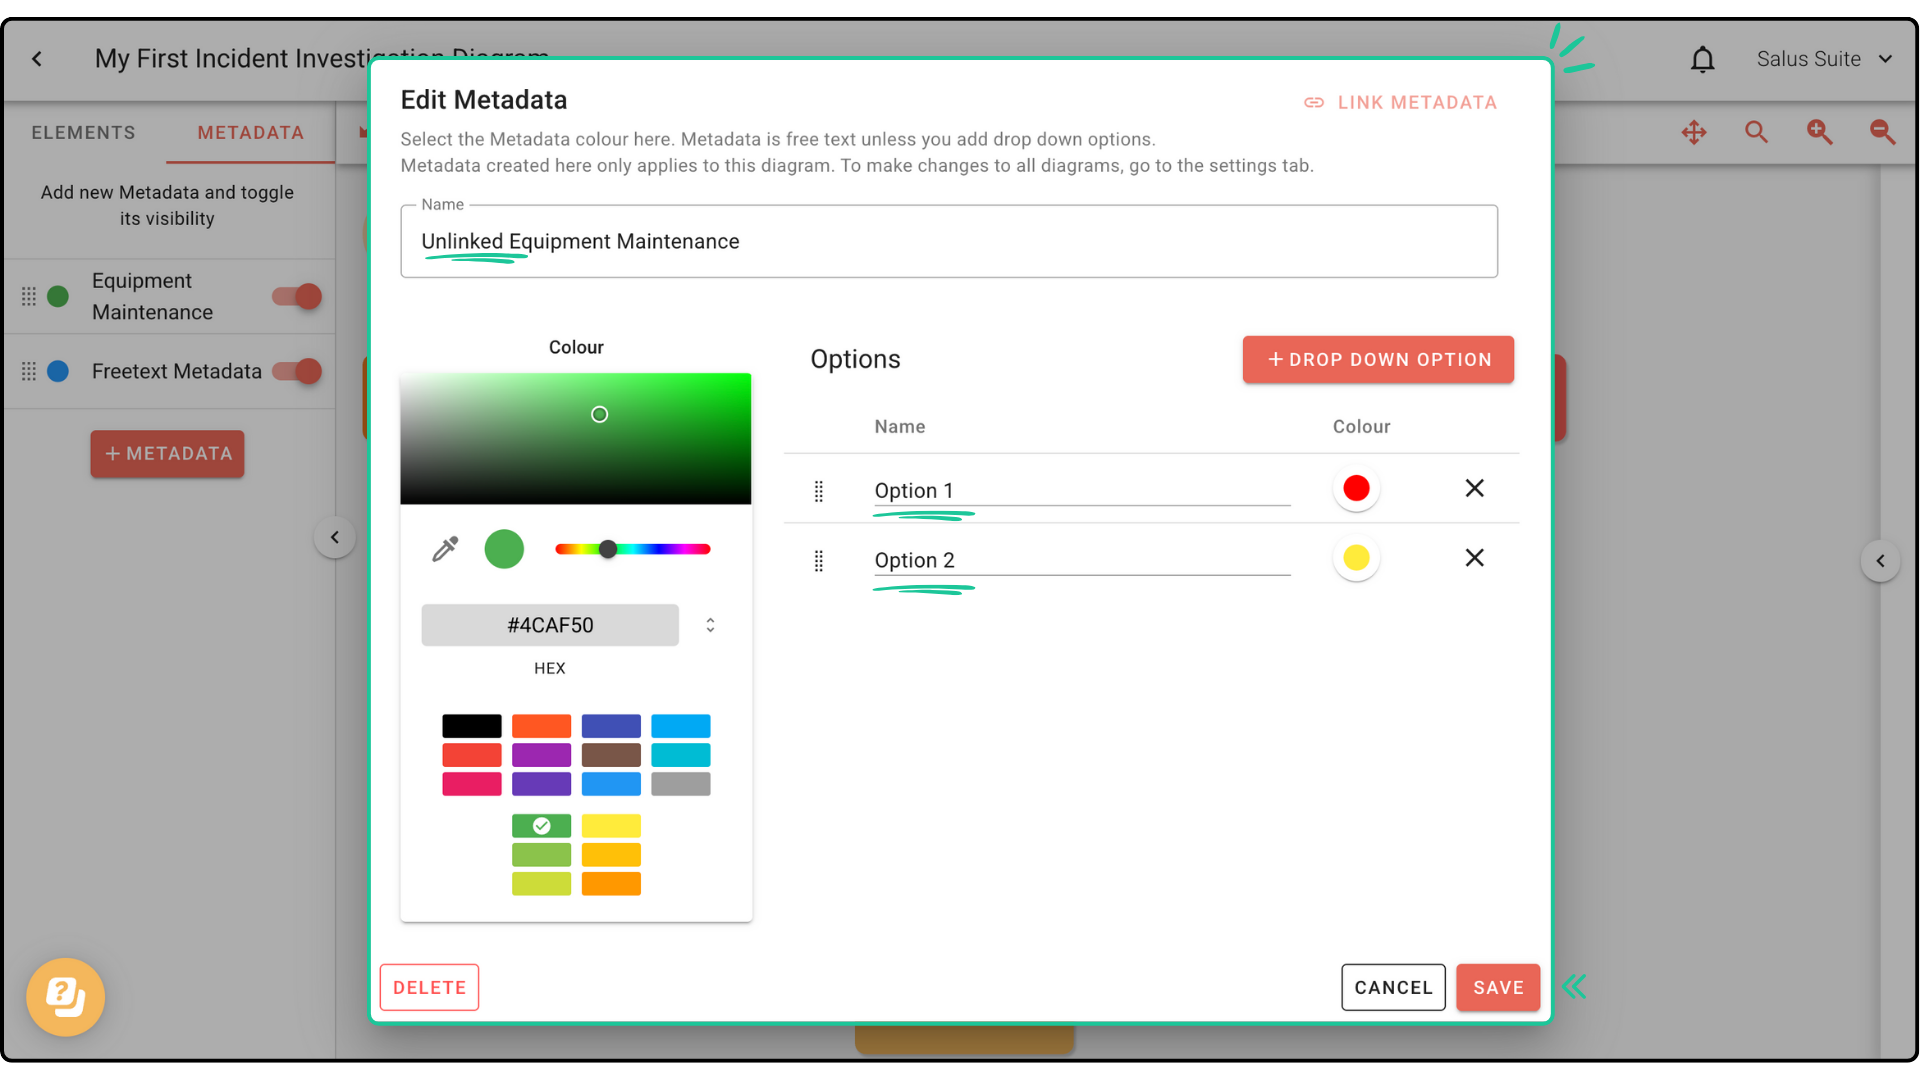
Step 2: In the pop-up, enter a name and assign a colour for the metadata. Click Save.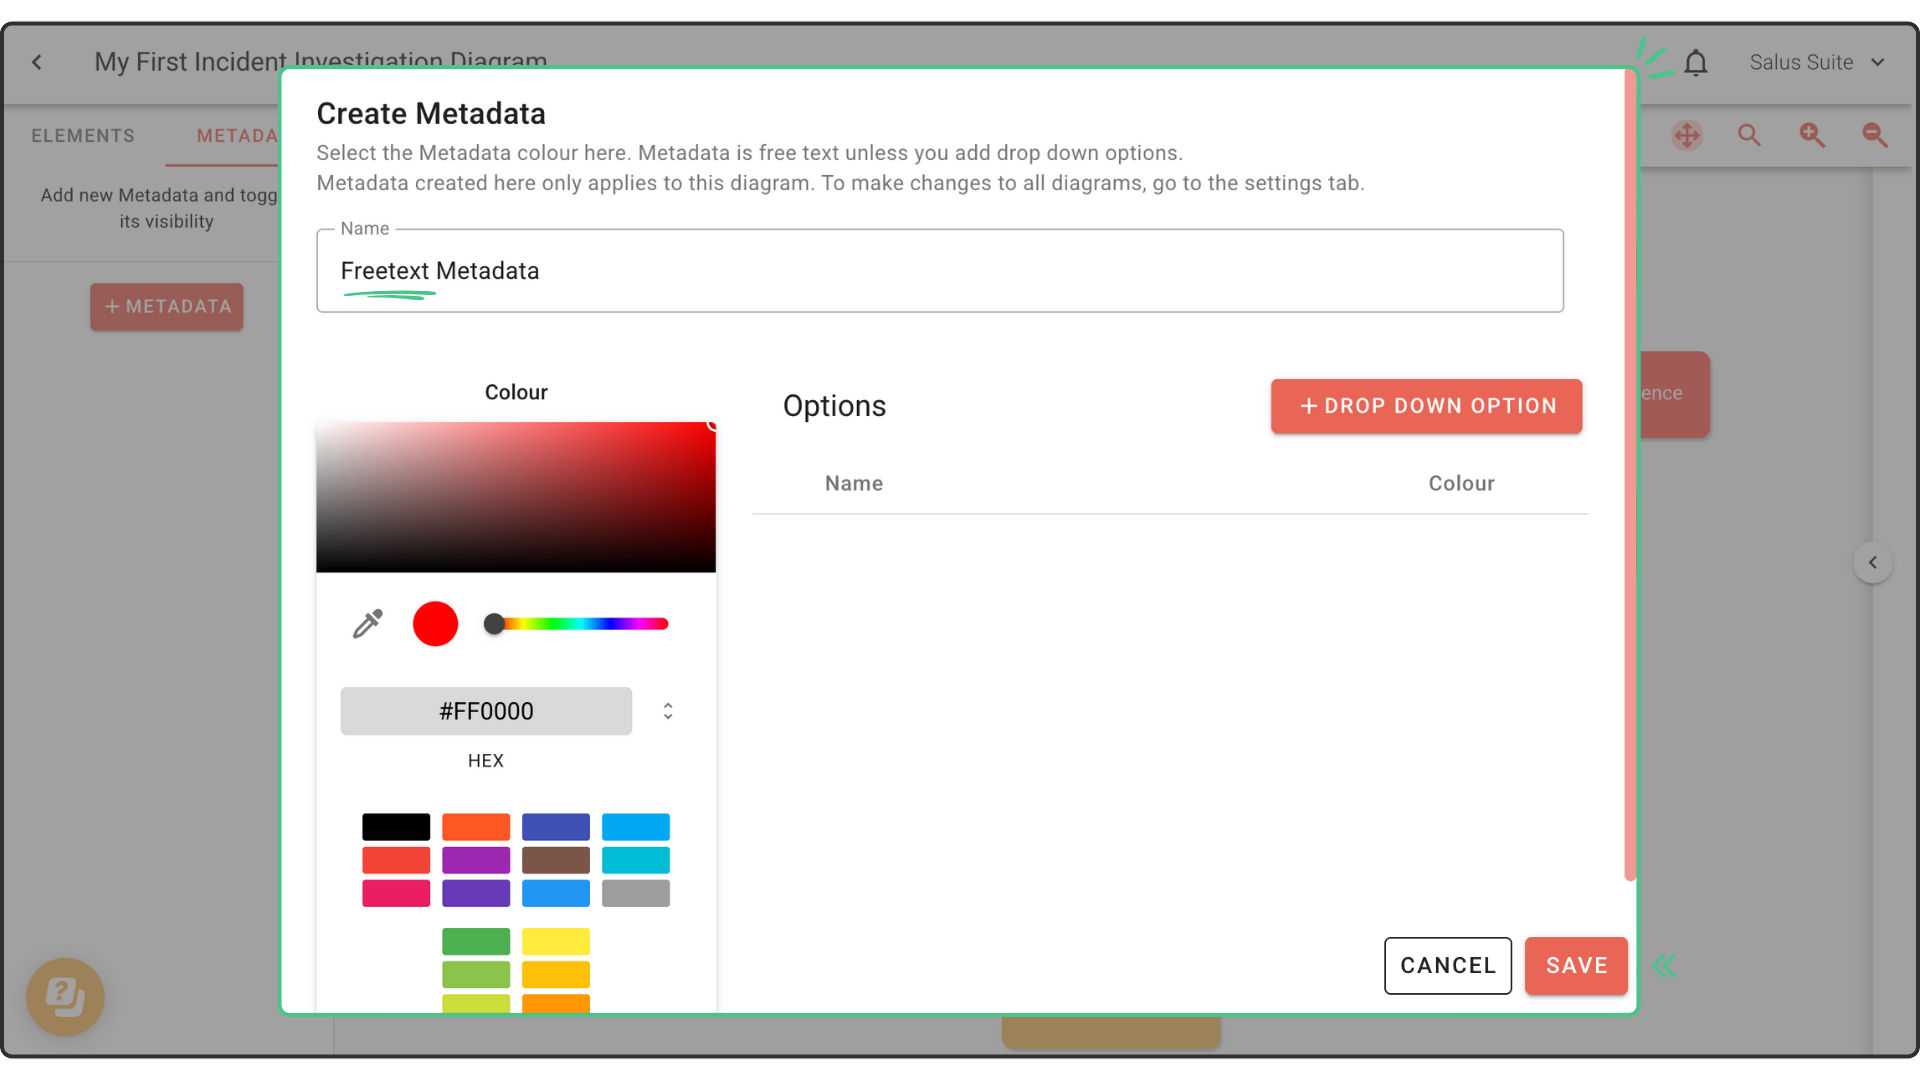
Option: To create a drop-down list of options, click + Drop Down Option on the right-hand side and assign a name and colour for the option. Click Save. 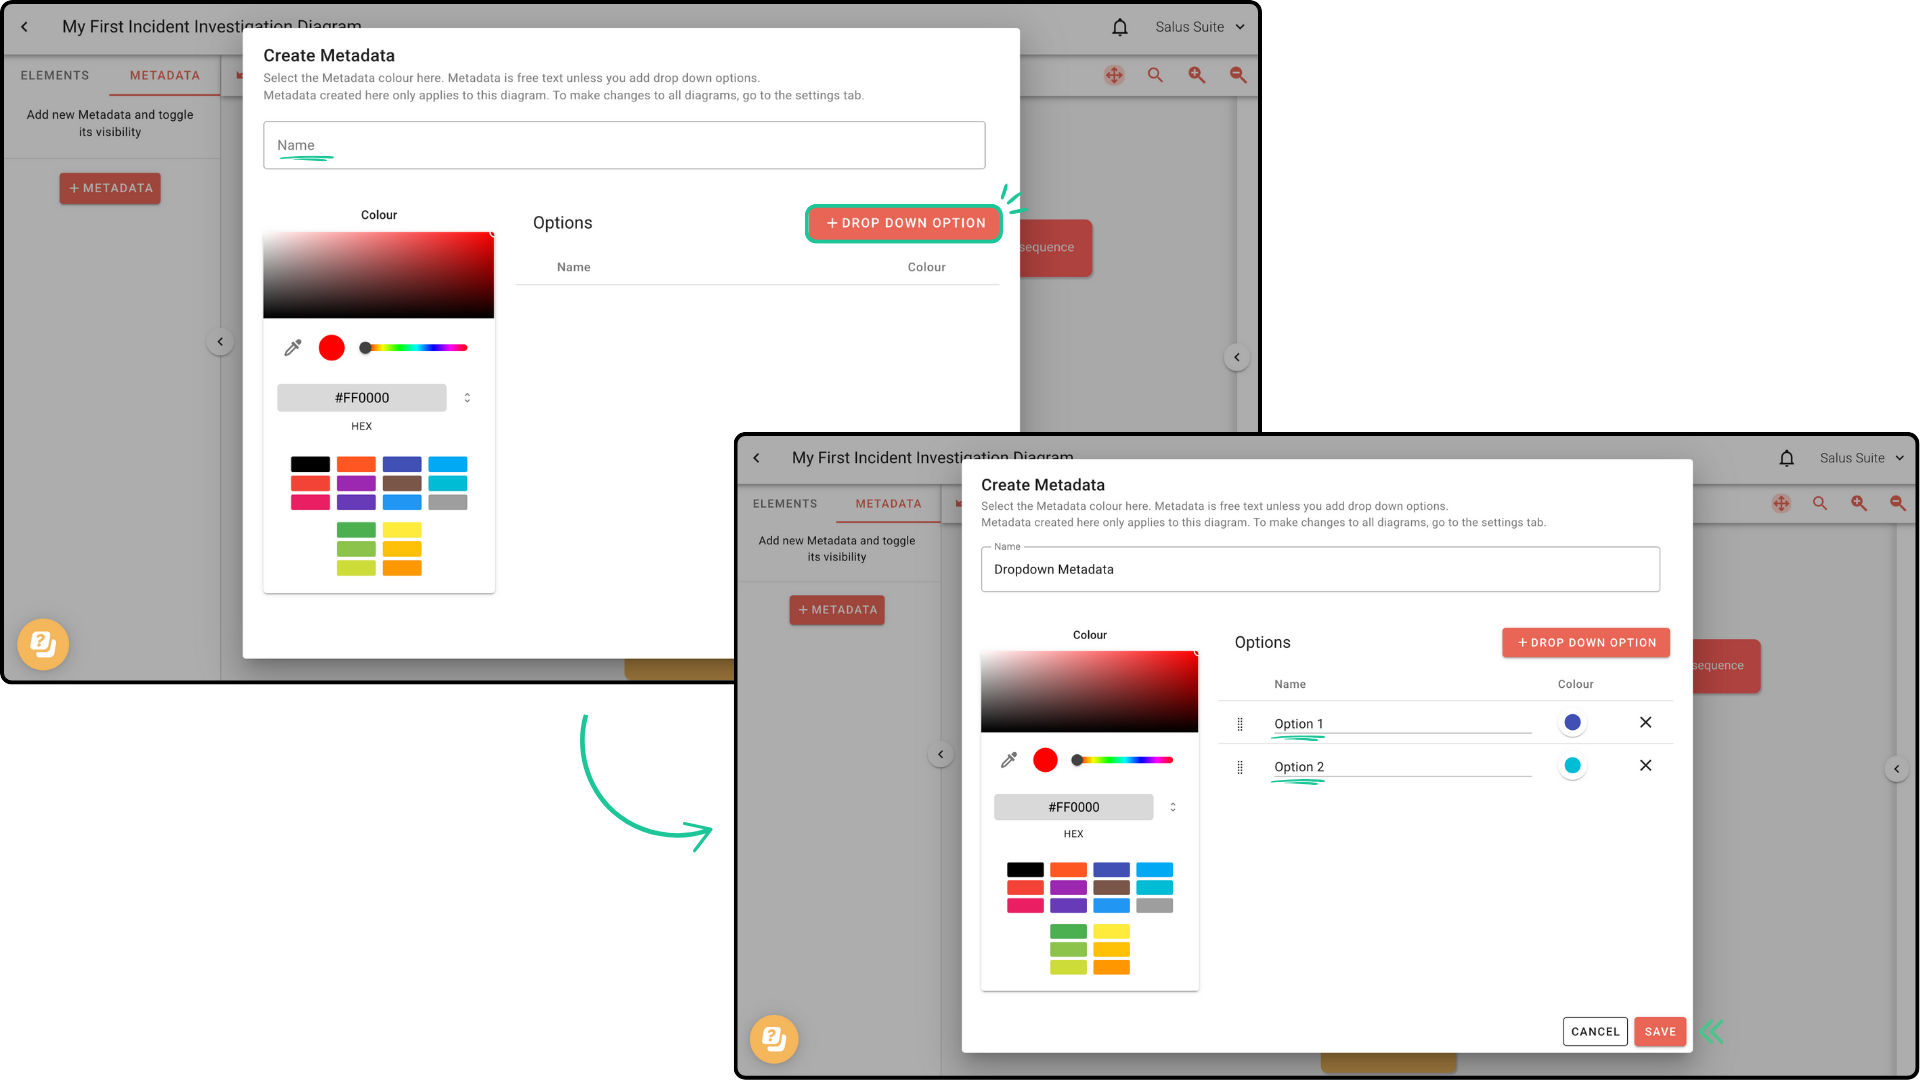
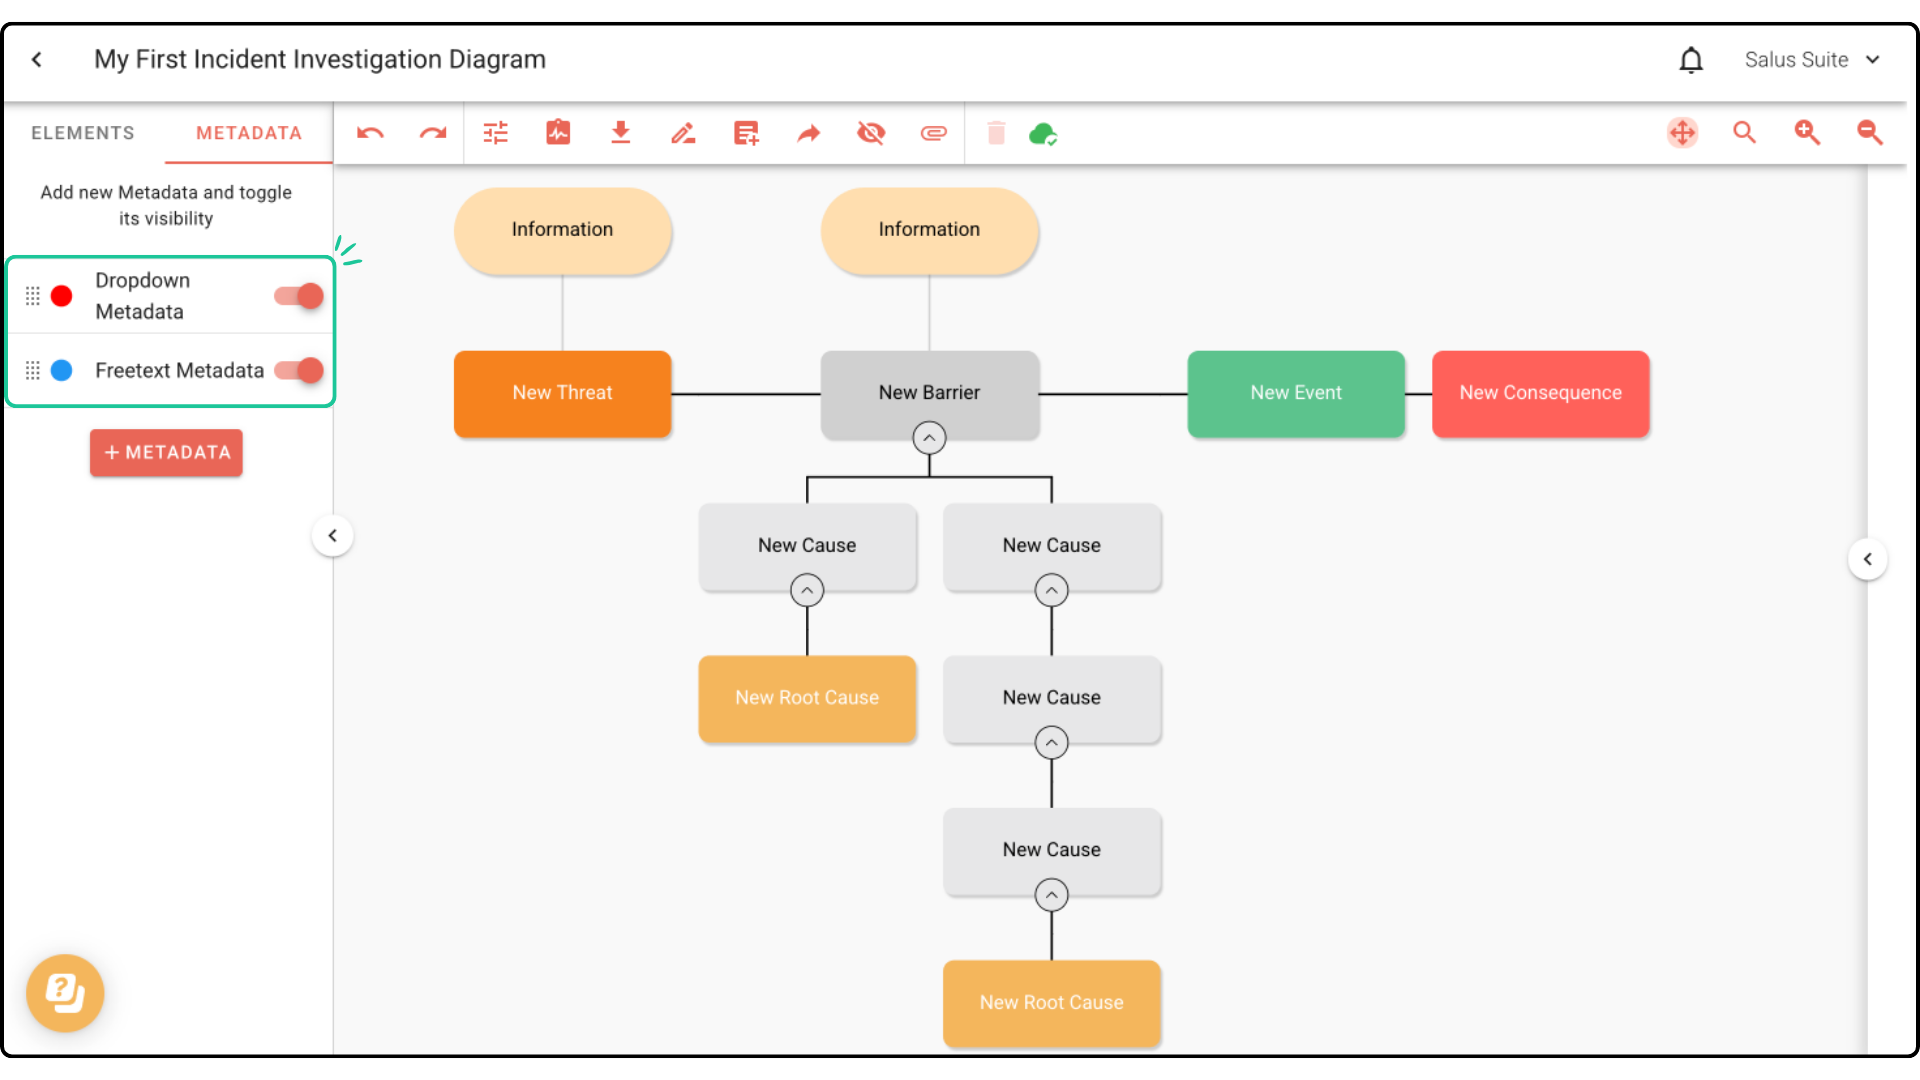
The newly created metadata will appear in the Metadata Menu:
Adding metadata to an element
Step 1: Double-click an element you wish to add metadata to.
Step 2: In the Element Description Box, assign the metadata you wish to add to the element. 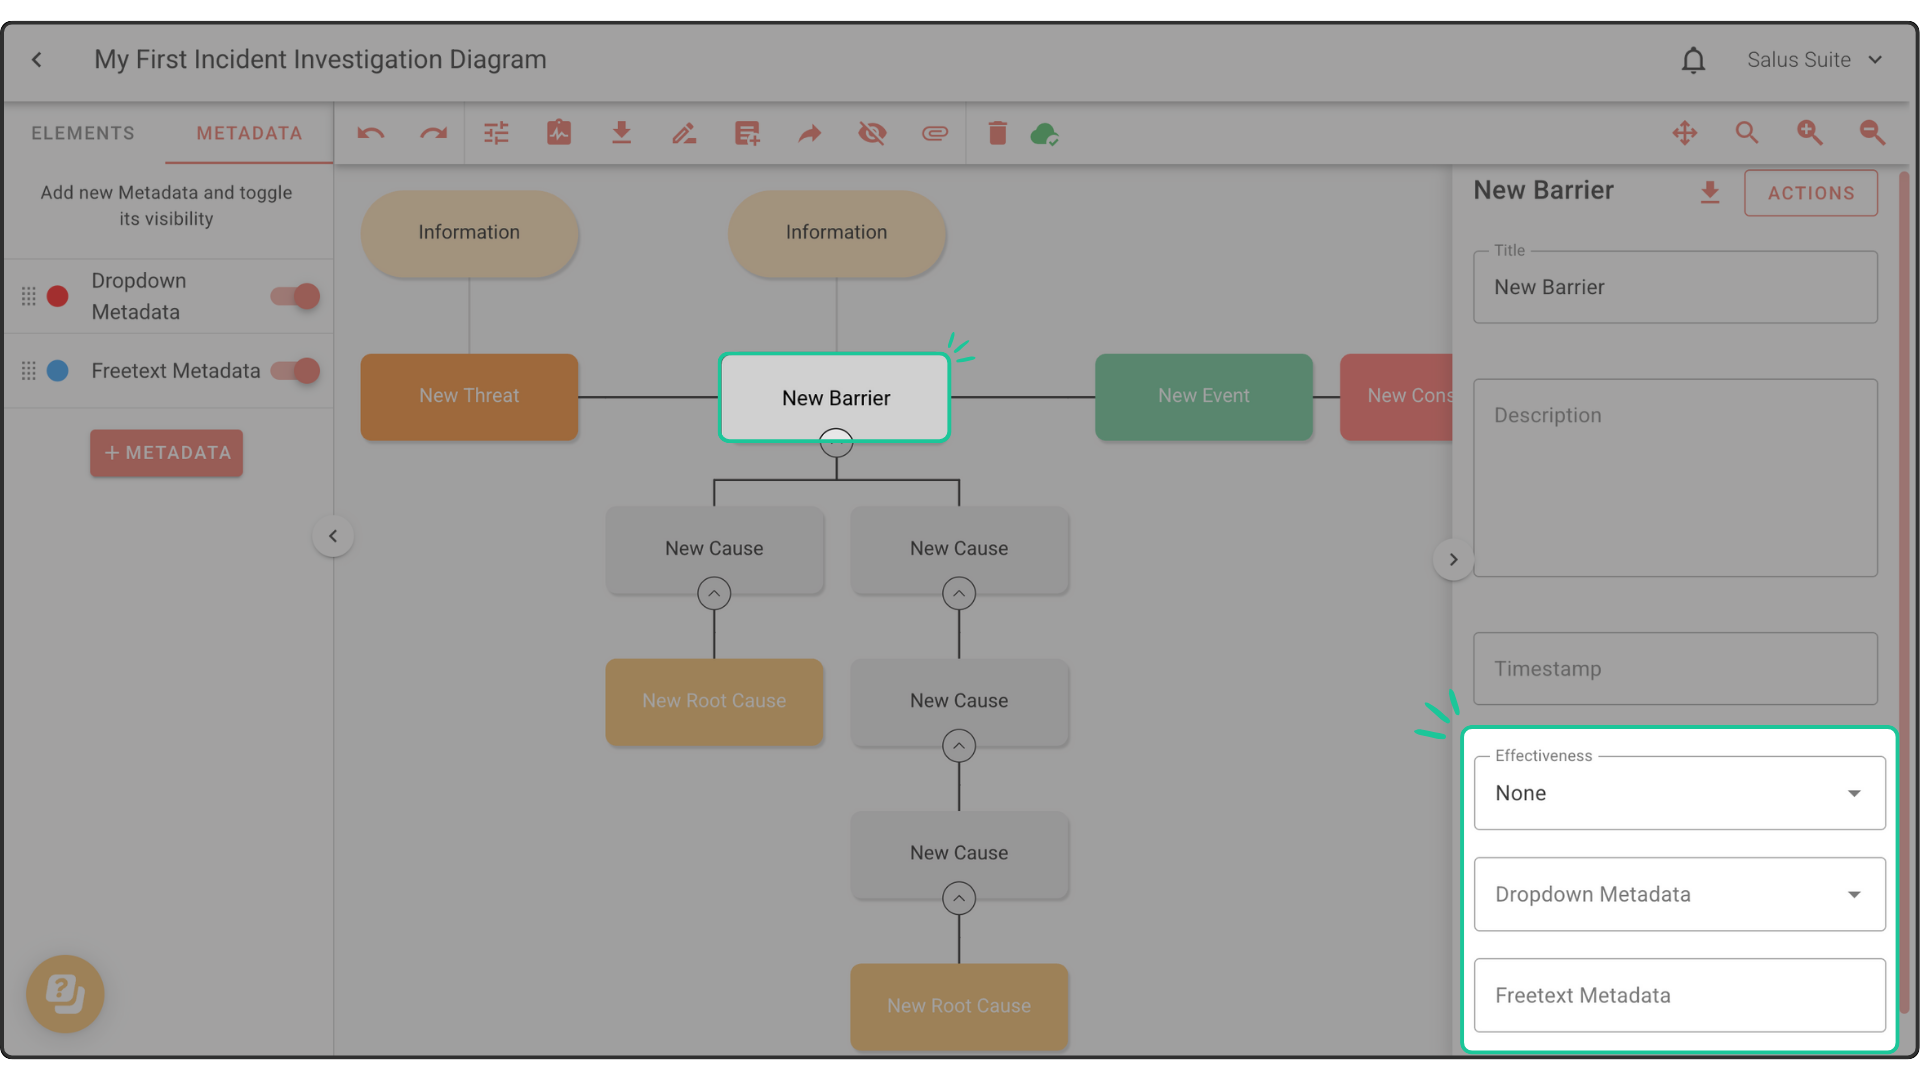
Step 3: The selected metadata will appear in the element. 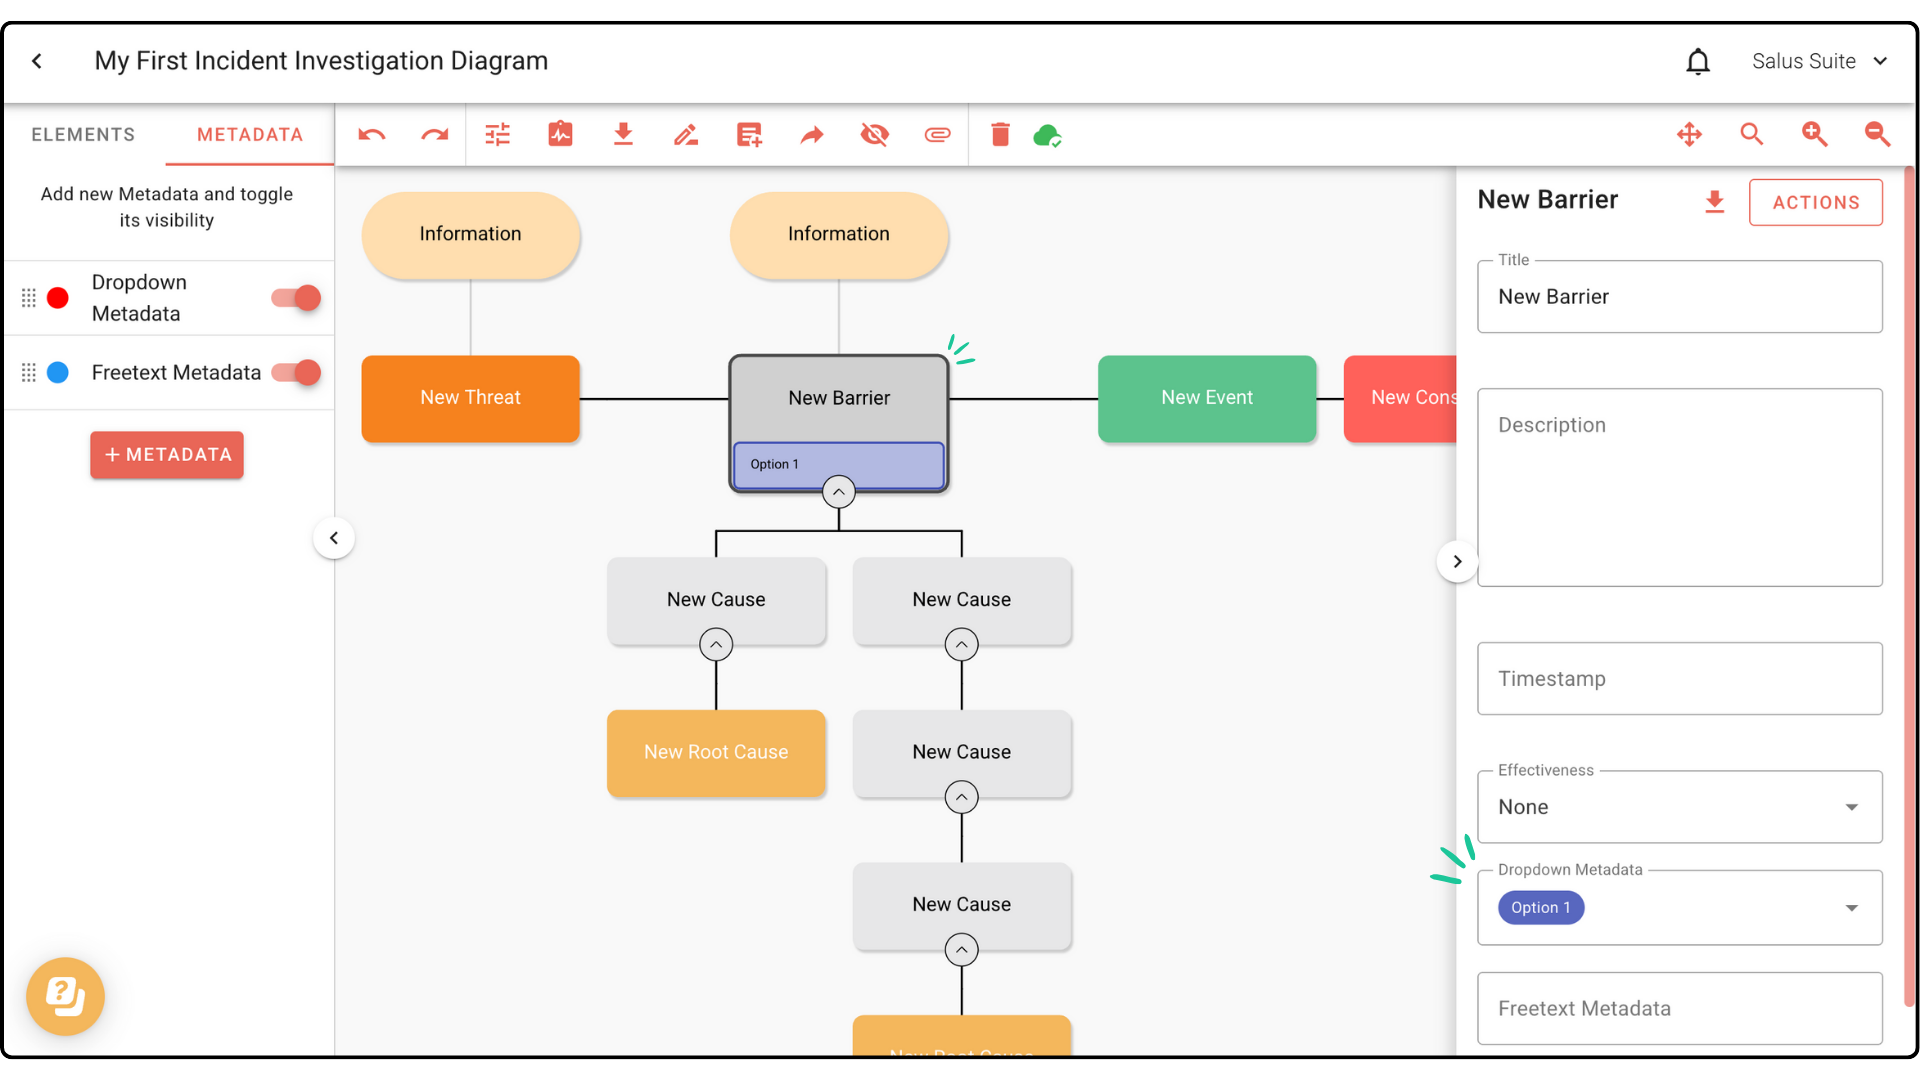
Deleting metadata within a diagram
Step 1: To delete metadata within a diagram, head to the Metadata Menu. Click the Metadata you wish to delete.
Step 2: In the Edit Metadata pop-up, click Delete. 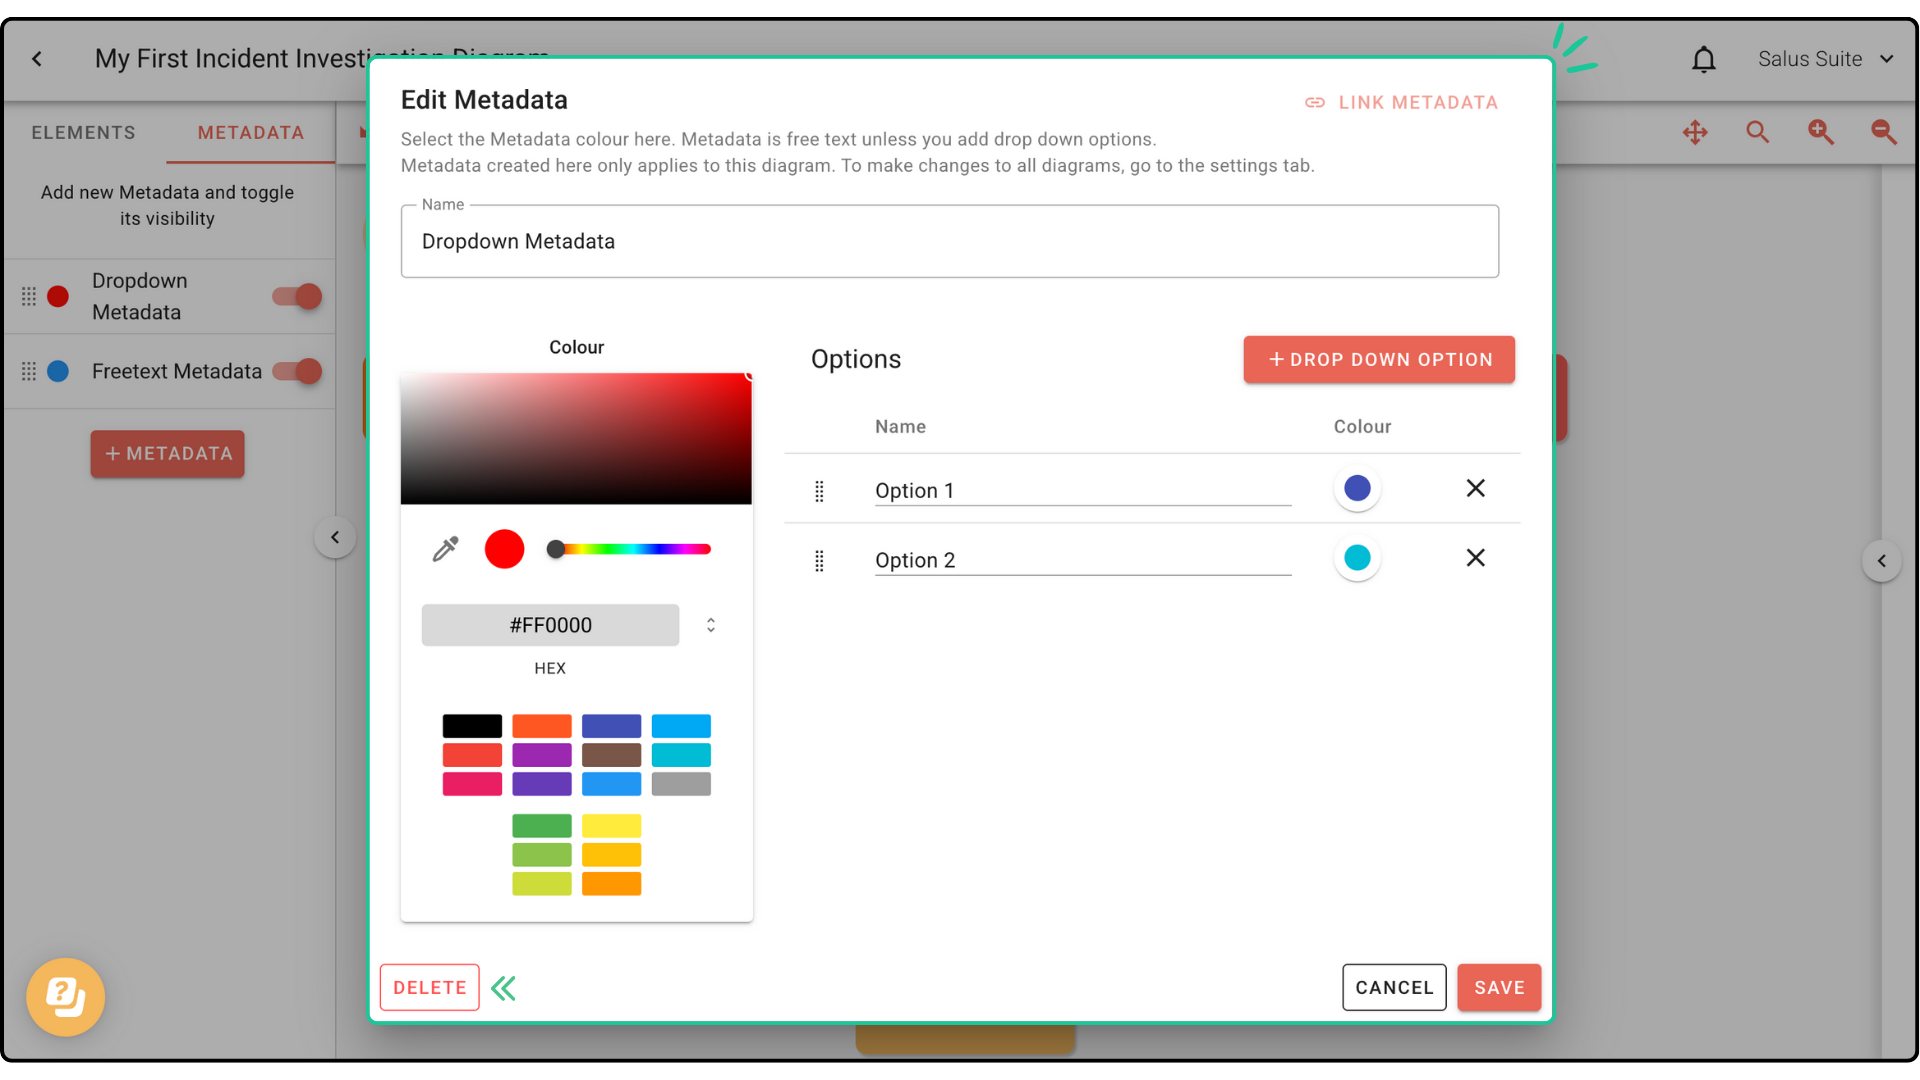
Step 4: A warning message will pop up. Click Delete. This will permanently delete metadata within the diagram. 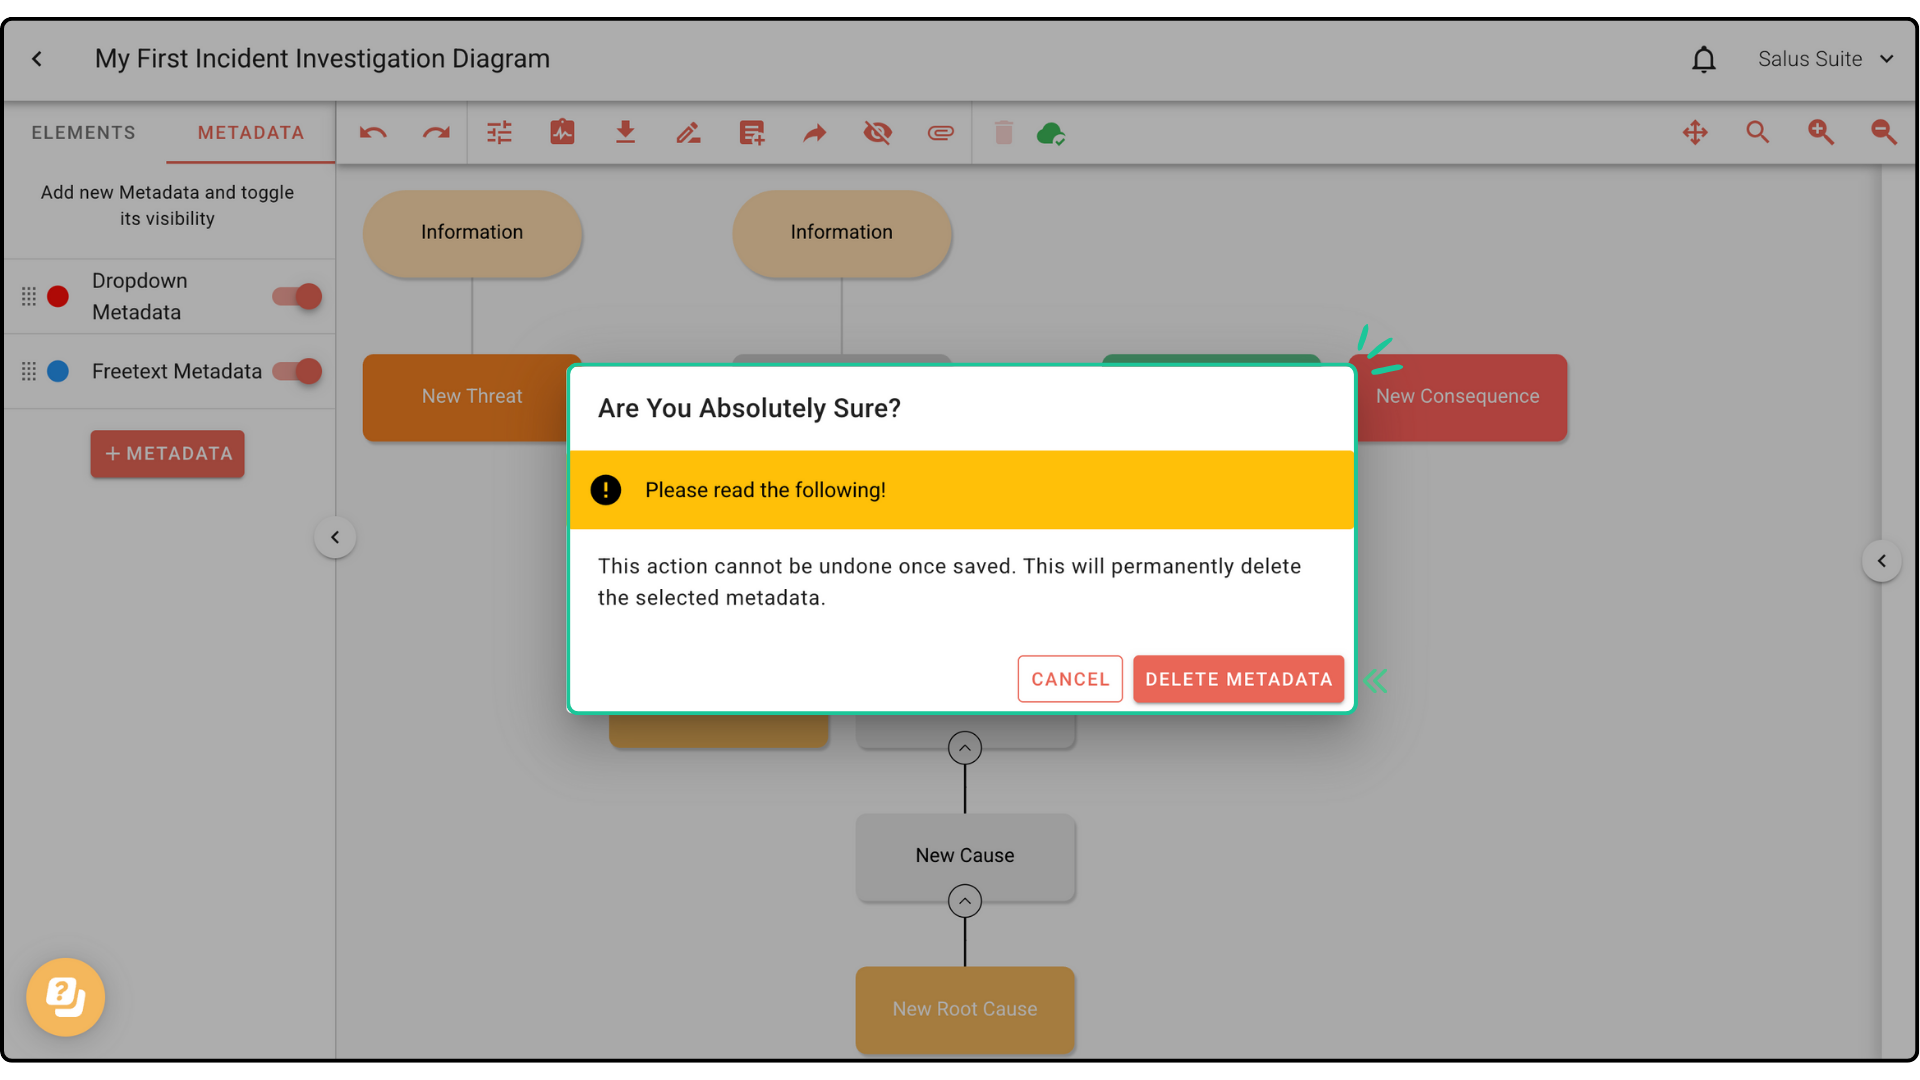
Linking and Unlinked metadata
When viewing a diagram, metadata can either be linked or unlinked.
- Linked metadata (shows “Unlink Metadata”) is synced with your organisation’s company metadata. It cannot be edited directly within the diagram.
- Unlinked metadata (shows “Link Metadata”) is specific to the individual diagram. It can be edited freely and tailored to that diagram, but it is not synced with the company metadata.
If you find yourself repeatedly creating the same metadata across multiple diagrams, consider linking it for consistency.
Step 1: To unlink metadata, click on the metadata. Click Unlink. 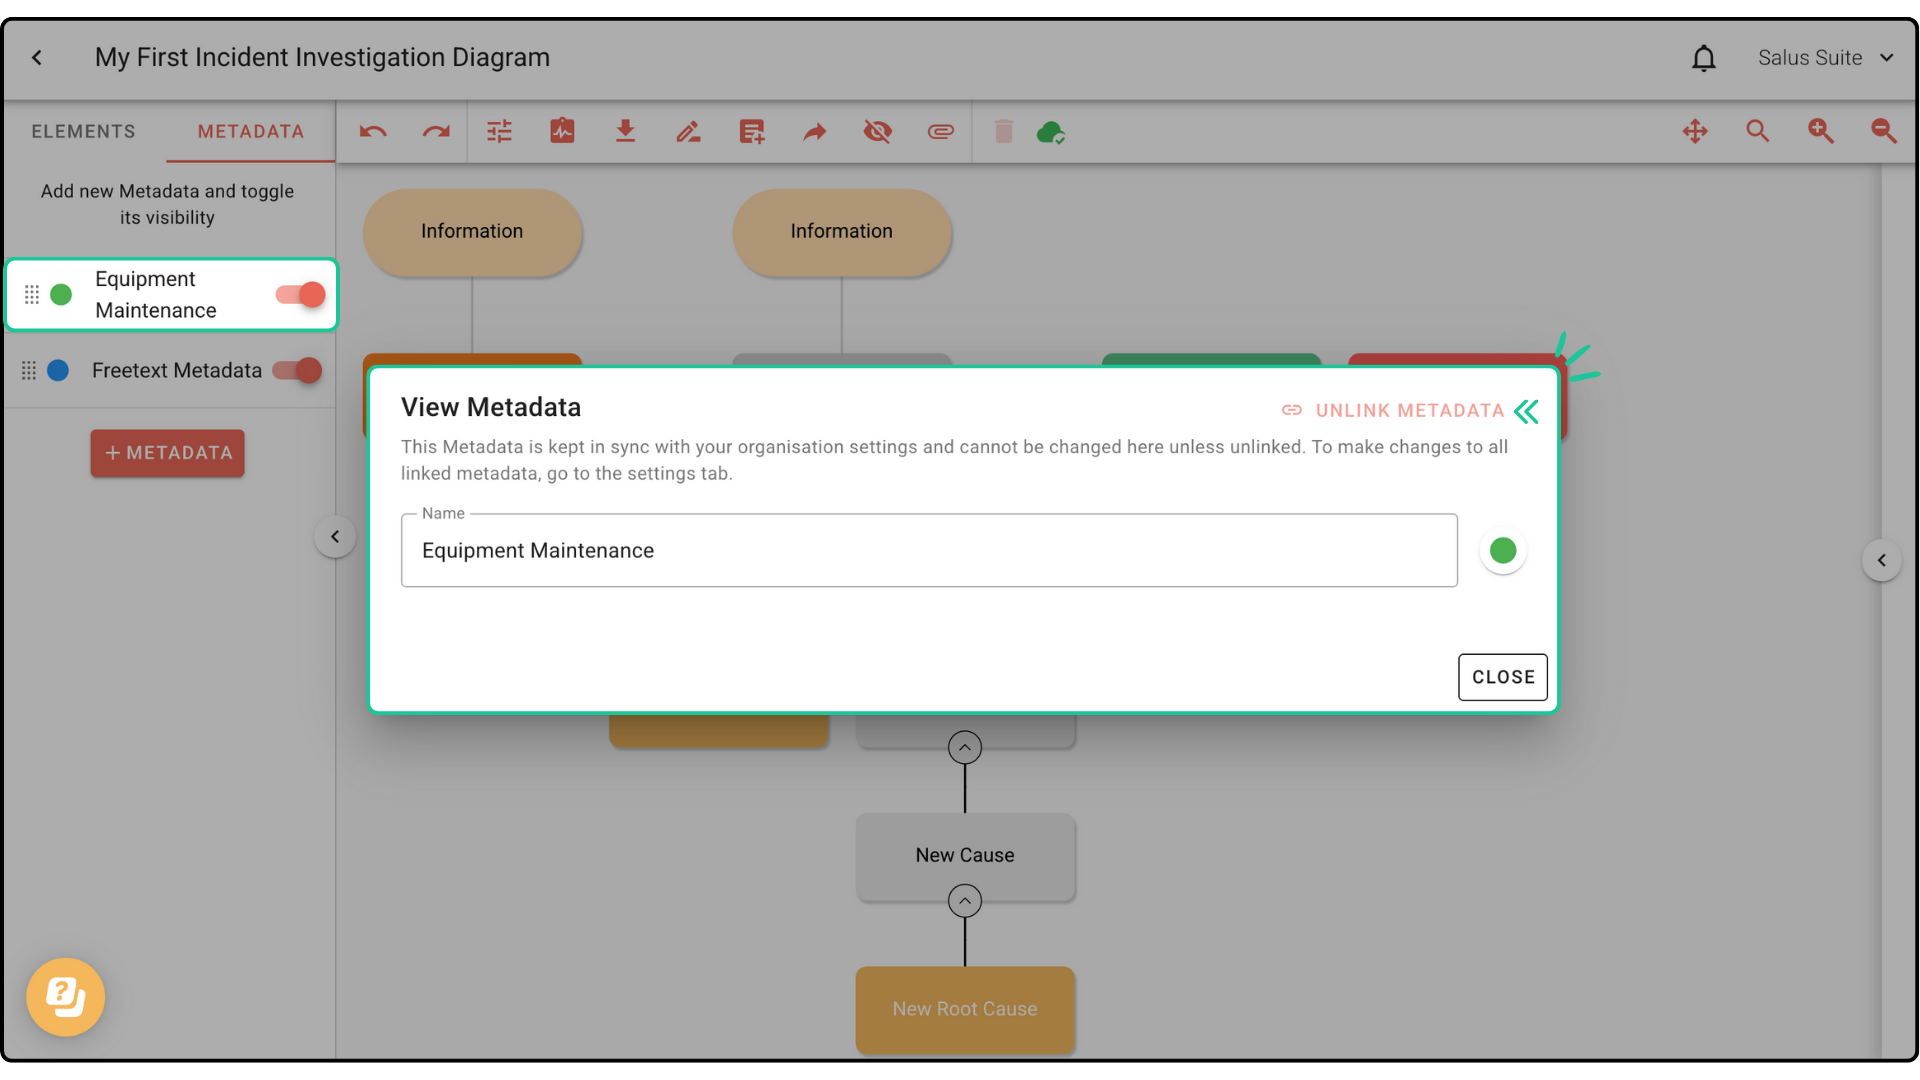
Step 2: To link metadata, click on the metadata. Click Link Metadata.
Step 3: In the Link Metadata pop-up, select the metadata from the drop-down menu. Clink Link Metadata.
The metadata is now synced with the company metadata and cannot be edited directly.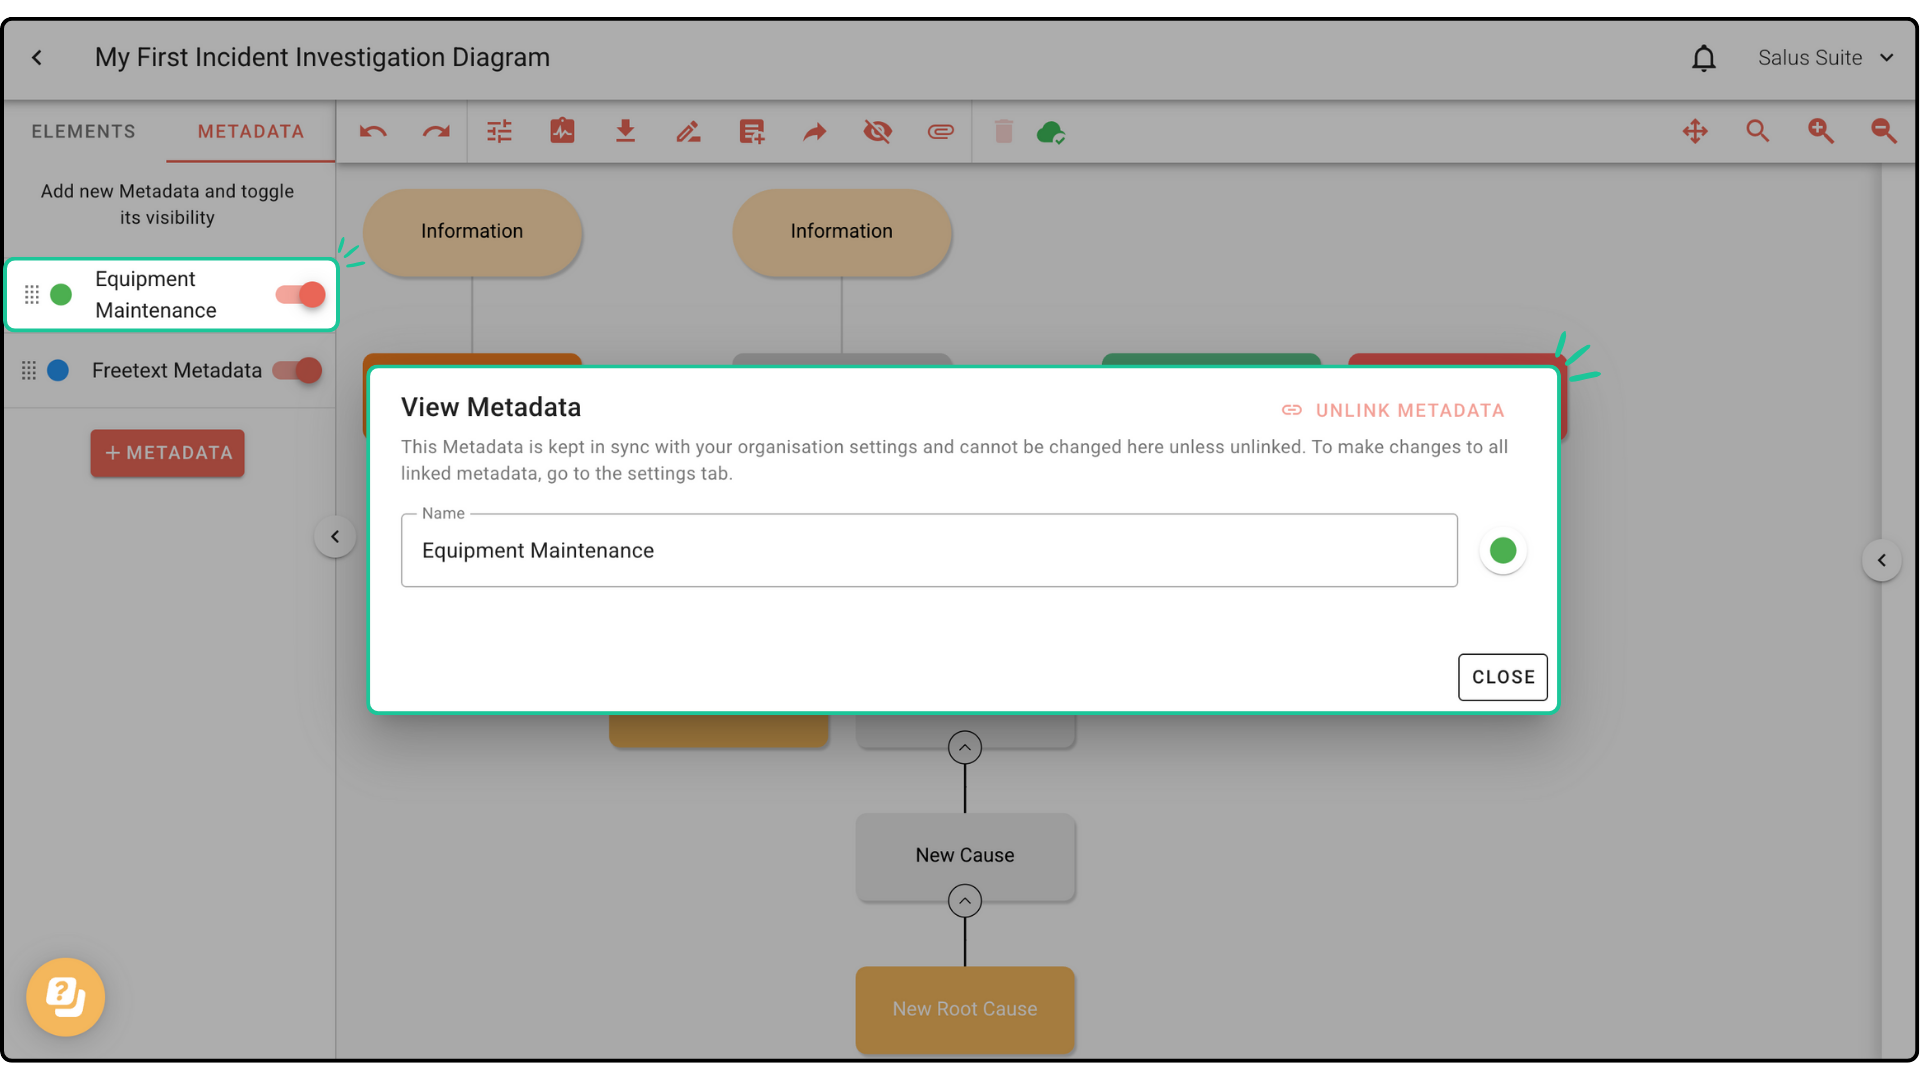
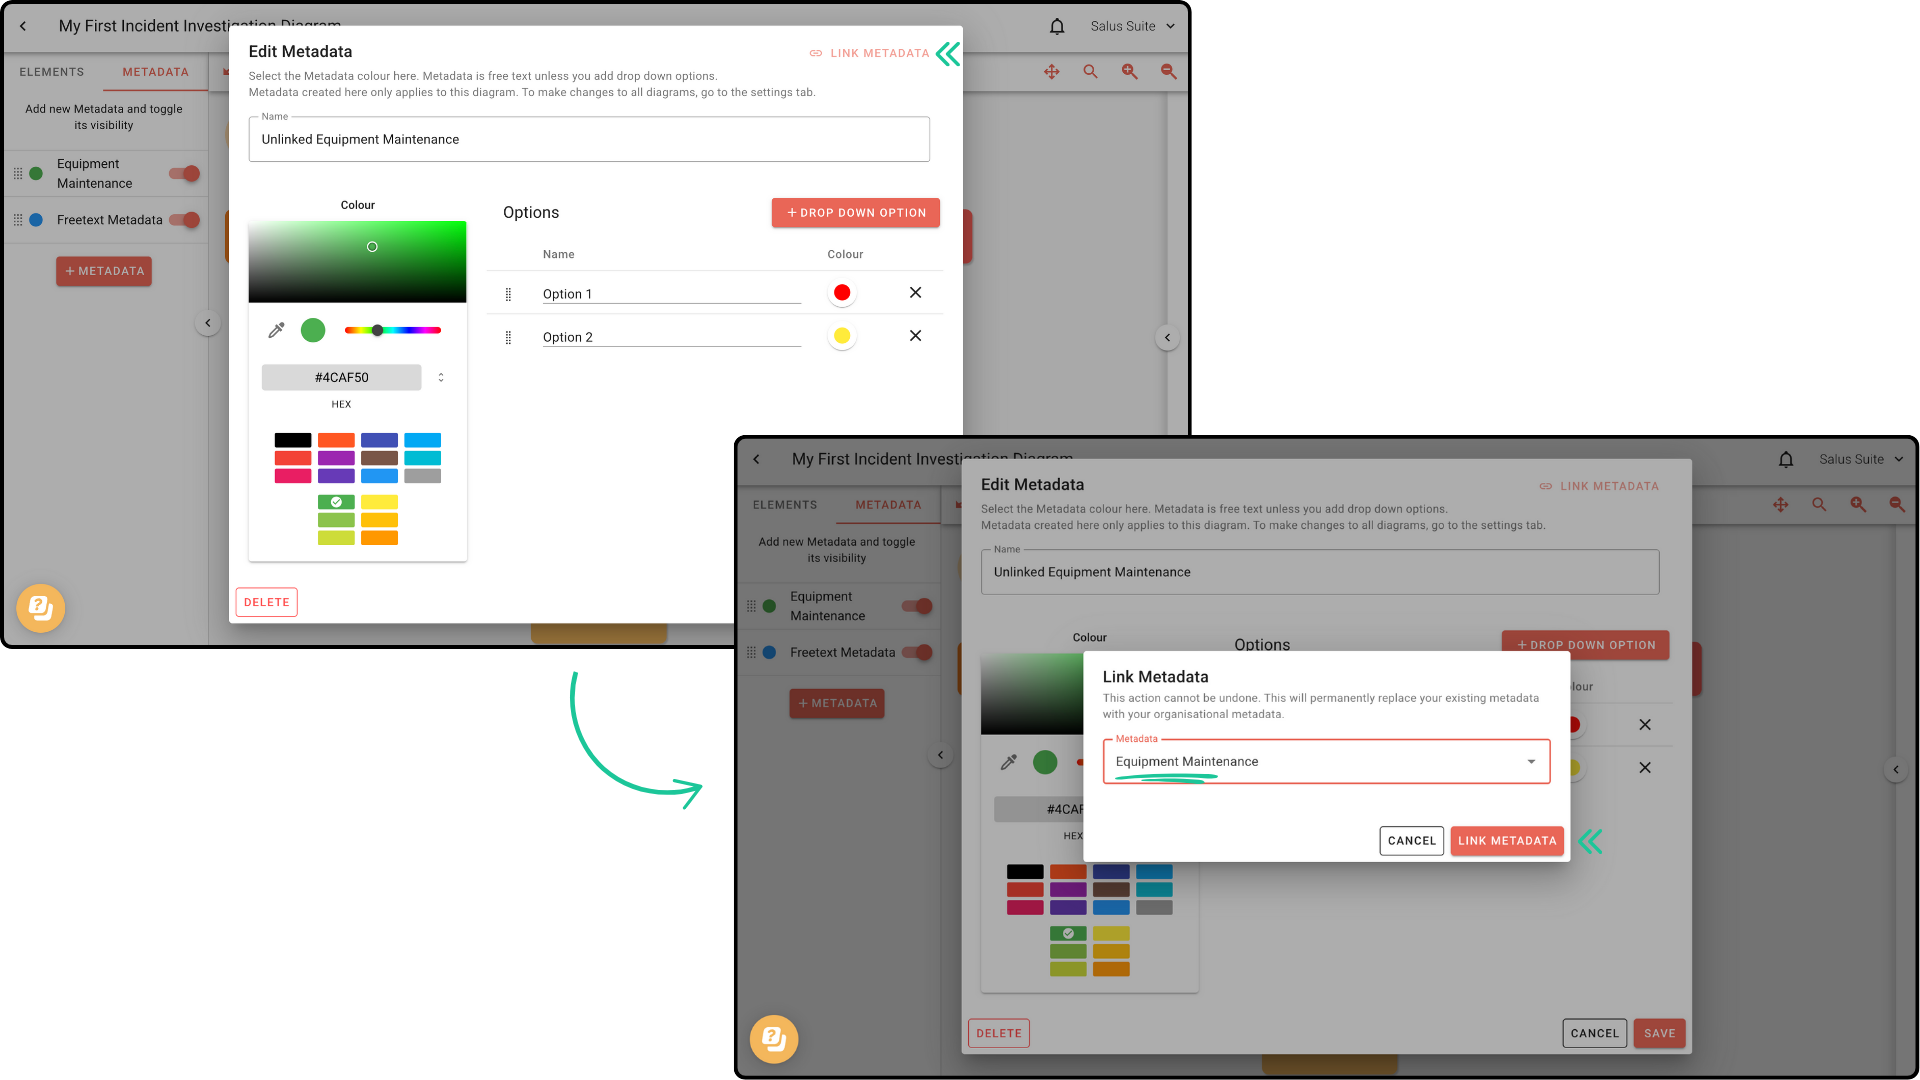
Relinking Metadata
Step 1: In the Metadata Menu, click on the metadata you wish to relink.
Step 2: Click Link Metadata.
Step 3: Choose the metadata you wish to link to from the drop-down menu. Click Link Metadata.
The metadata will now link to the company metadata.
Here is a side-by-side example of what happens if you re-link the metadata. In this example, we have edited the metadata’s name and added a dropdown option (see left photo). When linked, it will sync to the company metadata (see right photo). 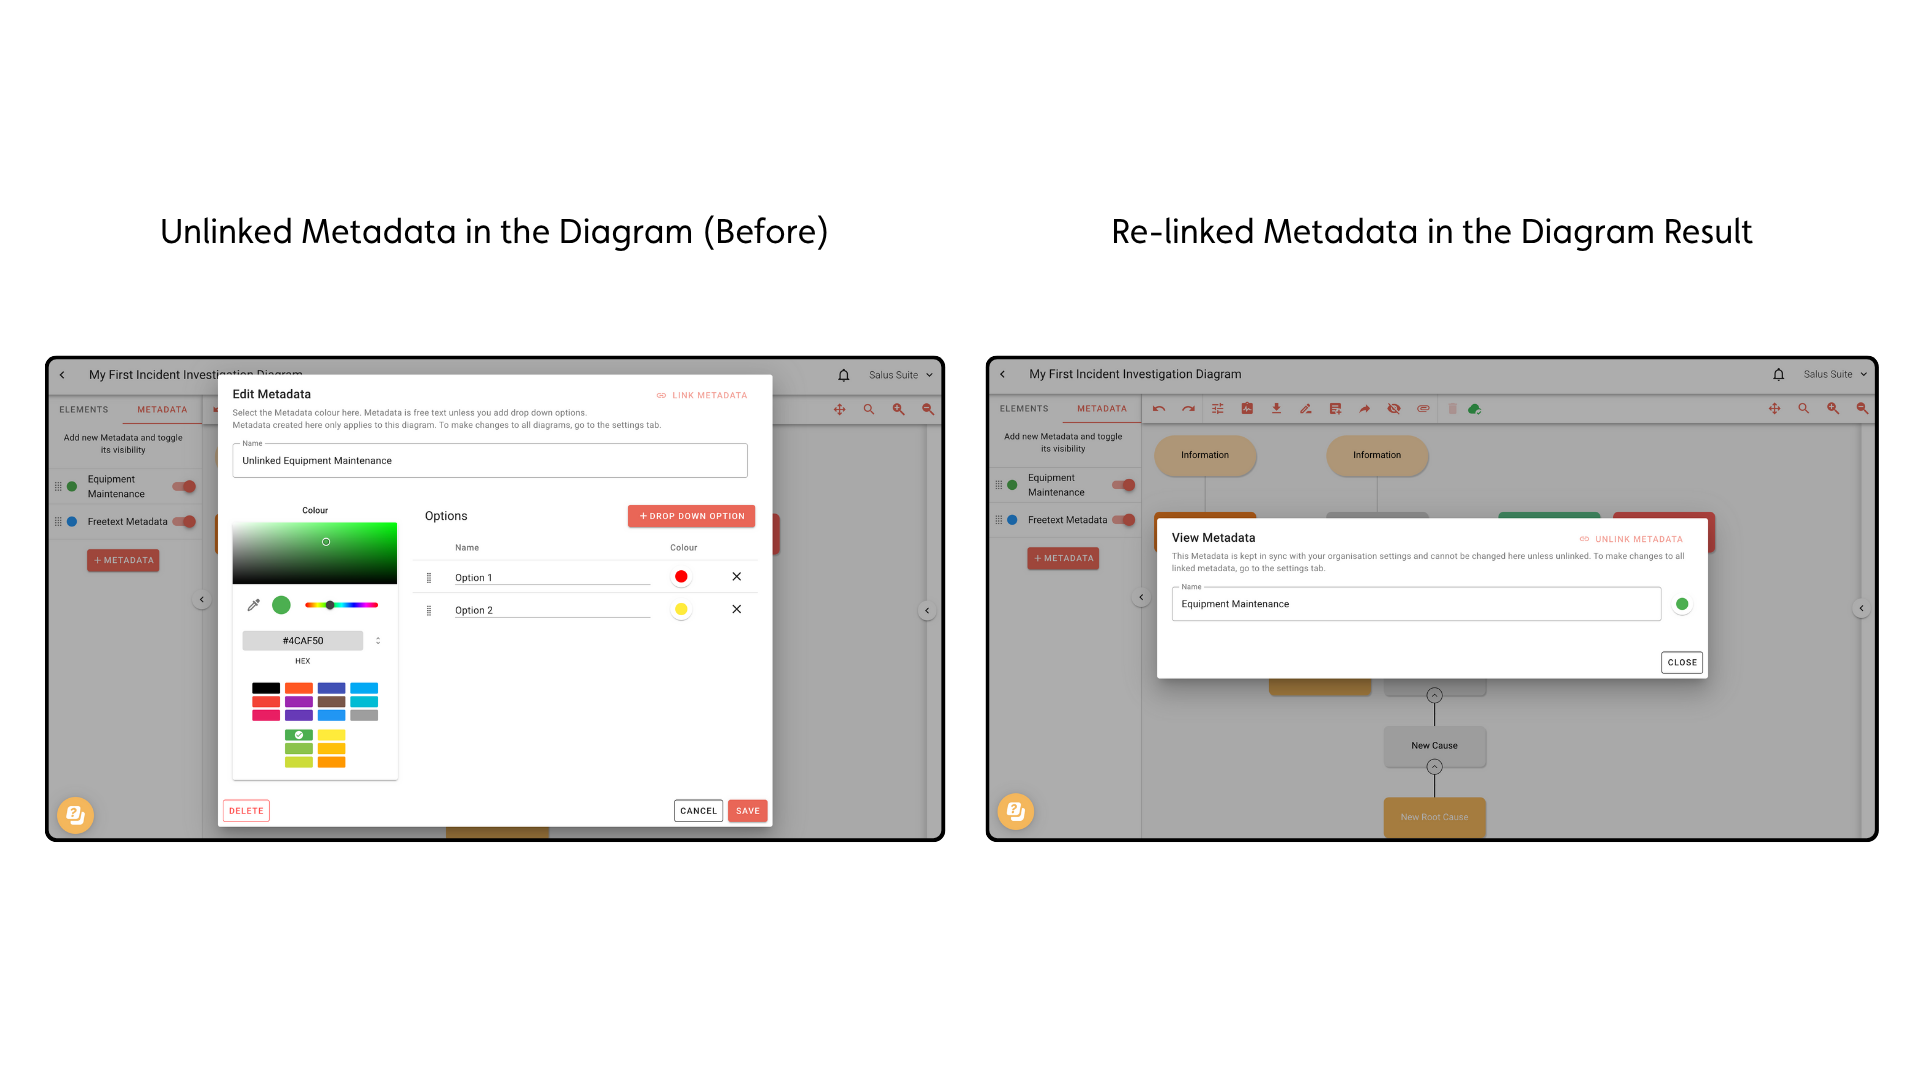
Editing metadata
Note: When you create a new diagram, all metadata is linked by default from Metadata Settings.
Step 1: Click the metadata you wish to edit. If the metadata is linked to the Company metadata, click Unlink. 
Step 2: Make your changes, then click Save. For this example, we renamed the diagram and added a dropdown option.
If the metadata is unlinked, you may proceed to edit the metadata. Click Save.


